DIY Installation Tips and Steps for Car Stereo Amplifiers
If you like music, you'd like your car to have the best music system so you can enjoy music even when on the road. A good car music system must have high-quality speakers powered by the best car stereo amplifiers.
If you like DIY projects, you won't need a technician to fix your amplifier. You can achieve this on your own and save the cost of hiring a technician.
Installing your amplifier and the speakers on your own will let you learn the skills that can help you update or tweak them in the future if need be. In this guide, we'll take you through a step-by-step procedure of DIY Installation tips and steps for car stereo amplifiers.
What's Needed of DIY Installation for Car Stereo Amplifiers

A car amp doesn't come with the wiring, so you need to buy these separately to help you connect the amp to the car's music system. The items you'll need include:
Ground and Power Wires
Your amp will have to be powered by the car's battery. So it has to be connected to the car's electrical system. To do this, you'll need ground and power wires. Choose thick wires that can accommodate the amp's power.
Thick cables are better than thin cables because they offer less resistance to the flow of electric current. If you use thin wires, your amp won't operate well and will not give its rated power output.
The amp you buy will have instructions on the best wire size you can use. The size of wires is usually measured in terms of their diameters or gauge. A thick wire has a lower gauge number and vice versa. Another thing you need to consider is the length of the wires. The wires should be long enough to connect the amp to the battery.
Check out also>>
An In-Line Fuse
A fuse is an electrical device that protects an electrical circuit against overcurrent. In case of too much current, the fuse will melt, hence breaking the circuit.
You need an in-line fuse between the battery and the amp. This will protect your car in case of a short circuit that can cause a fire. If you have a 16 to 20 feet long fuse run, you can use it with any of the below wire gauges:
- 10-gauge wire for 25-ampere fuse
- 8-gauge wire for 60-ampere fuse
- 4-gauge wire for100-ampere fuse
- 1/0-gauge wire for 250-ampere fuse
Another way of doing it is to buy an amp wiring kit that suits your amp's specifications. Such a kit will contain matching turn-on, ground, power wires, plus fuses.
They are quite convenient to use because you'll not have to worry about the wire gauges and fuse ratings. They eliminate potential damages or confusion.
Speaker Wires and RCA Cables
Speaker wires connect the speakers to the amp. You can use any wire size from gauge 18 to gauge 14. If you are using subwoofers, you can use wires between gauge 16 to gauge 12.
You'll also need an RCA cable for the amp. These cables come in pairs and are of different lengths. They are used to get signals (input) from the output of the stereo receiver.
DIY Installation Tips and Steps for Car Stereo Amplifiers

Once you have all the above items, you'll be good to go. Follow the steps below to install your amp successfully.
- Disconnect your car battery
Before installing the amp, pack the car on an even surface, and engage the parking brake. You can then open the car's hood to give you access to the battery.
Disconnect the battery's negative terminal before disconnecting the positive terminal. Disconnecting the battery ensures there will be no shocks or shorts when installing the amp.
Check out also>>
Top 10 Best Amps for Acoustic Guitar Buying Guides and Reviews
- Mounting The Amplifier
Choose where to mount the amp in the car. The place should be secure and hidden, a place where the passengers can't knock the amp. Amp manufacturers usually recommend where to install the amp in the car.
As a general rule, amps need some air space because they produce heat as they operate. So make sure you get a space in the car that can provide the amp with adequate air space to keep it cool.
Never mount the amplifier upside down because this may cause the amp to overheat, causing a risk of a fire outbreak. This is because the amp's heat will not find an escape route when the amp is mounted upside down.
Read More> How to Build Your Own Car
The place you choose should have enough room for the connecting wires and give you easy access to the amp controls. Do not put the amp too close to the stereo system, as this might cause radiant noise and interference that will cause poor sound quality. The amp should be about one meter away from the stereo and should not be bolted directly onto the car's metal chassis. Doing so will invite noise and interference problems.
There are two ways of attaching the amp to the car. You can either mount a wooden board on the chassis, fix the amp on it, or use a rubber grommet around the screw you used to fix it.
The places where you can mount your car's amplifier include under a seat, in the hatch/trunk area, or on the firewall on the passengers' side (you can use patch cords or short wires).
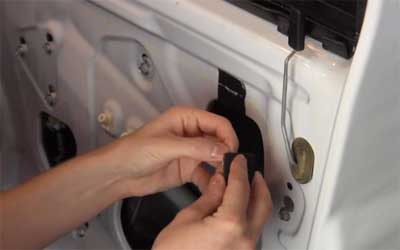
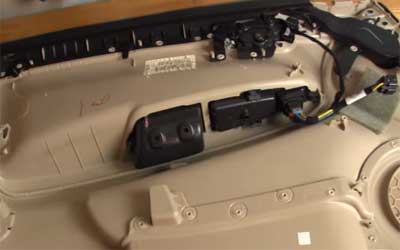
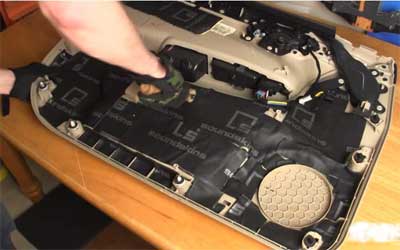
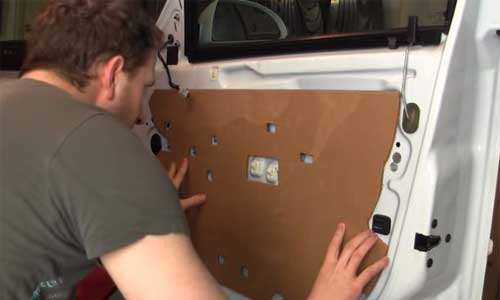
For safety and aesthetics purposes, you should conceal all connecting wires. Leaving loose wires in the car can cause accidents. You can run the connecting wires under the pillar trim panel, door scuff plate, kick panel, or dash. It's quite easy to remove these panels, lay the wires, and put them back.
You can either pry them from their edges or unscrew them using a screwdriver. To hold the wires in place, use wire ties. This will ensure the wires do not get into contact with any moving vehicle parts. The wire ties should be made of plastic.
Check out also>>
- Power Wire Installation
The power wire should run from the car's battery to the amplifier through the firewall and the car's body. Check the firewall for any unused grommet through which you can pass the wire.
If none is free, pick one with enough space for the power wire to pass. If your car has no grommets that you can use, drill a hole in the firewall, wide enough to accommodate the power wire.
Be careful not to drill too large a hole or drill into gas lines or the existing electrical wires. Once you've drilled a hole, insert a grommet on it to protect the wires you'll pass through it.
Check out also>>
- Installation of The Fuse Holder
If you have a power wire with a fuse holder already installed, then you can move to the next step. If not, you have to install the fuse holder. To do so, find a good place along the wire to install it. The fuse holder should be near your car battery, not more than six inches from the car battery.
Use a cable tie or a screw to hold the fuse holder in place. Cut a small piece of wire from the power wire's end. The piece should be able to reach the car battery from the fuse holder. Using a stripper, strip off the insulation from both ends of the wire you cut.
You can then connect the fuse holder to one end of the short wire and attach a terminal ring to the other end. Strip the insulation from the end of the power wire, then connect it to the fuse holder on the other end.
Check out also>>
- Power Wire Installation
One end of the power wire is attached to the positive terminal of the battery. If your power wire has a ring terminal already, well and good. If not, you have to attach it.
The battery terminal has a nut that you should remove before placing the ring of the power cable.
Once you've put the ring in place, you can hold it firmly using the nut. Do not attach the power cable to the post. If you have a wire loom, coil it around the cable from the firewall to the battery.
You can do the same to the short wire you used to connect the battery to the fuse. The loom will protect your power wire against the heat generated from the engine of the car.
Check out also>>
- Ground Wire Installation
To install the ground wire, you need a bolt on the car's frame somewhere close to the amp. If there's none, you can drill a hole near the amp, making sure not to drill into the gas tank or electrical wires.
Get a ring terminal and crimp it to the ground wire. Clean the dirt and scrape paint off the bolt's location so the ground cable can connect the cable directly to the metal. Bolt the ground wire tightly into the metal chassis.
The improper or lose ground cable can cause serious problems with your amp and car stereo. Remember that the ground cable is the most important component of all and must therefore be installed properly.
- Plugging in Remote Turn-On, Speaker, and RCA Leads
This is the step in which you connect the amp to your car stereo. Plug the leads correctly for your system to work well. If you bought a head unit with no remote turn-on output, you could connect the power wire terminal (fused out end) to the turn n wire.
Connect the subwoofer, rear, and front wires from your amplifier to their corresponding speakers. Ensure all the connections are safe and tight. Loose wires may cause poor sound quality and cracking sounds in the subwoofer or speaker.
When connecting the RCA cables, put them on the opposite side of the power cables to prevent noise.
Check out also>>
- Test The System
Before you test your music system, turn the amp's gains to a minimum; turn off all filters, EQ, and bass boost. Check the fuse to confirm it is secure. Remember, it is this unit that's protecting your music system.
Once you've confirmed the fuse is fixed well, you can connect the battery's negative cable. Turn on the car and also the radio. Check if the amplifier is powered. The power light should be on.
Turn on the music and confirm whether each speaker is producing sound. Test your stereo using the subwoofer settings such as fade and balance. Next, you can confirm if each speaker works well with no distortion or static interference.
Match the amplifier's gain to its input level and the output level of the receiver. If you are satisfied with the sound quality, then it means your amp has been installed correctly.
Check out also>>
You Can check the video to know "How to install an amplifier to a car stereo"
Troubleshooting

Since you may not be an expert in amp installation, it's good to know some problems that might arise. Some of these problems include:
- The need to reset your radio's factory anti-theft code
- An electrical system may malfunction
- The speakers may fail to produce sound
- You can hear some noise coming from the speakers.
In case you experience any of the above problems, re-check your entire system while being guided by DIY Installation Tips and Steps for Car Stereo Amplifiers above. You might notice the cause of the problem. If you can't locate the problem, you can seek expert help. Contact a specialist in car amplifier installation to help check your stereo system.
Final Words
DIY car amplifier installation is a very satisfying activity. When you do it successfully, you have some sense of pride and satisfaction. However, you have to note that the installation's specifics will depend on your vehicle's make and the amp model you bought. If you aren't confident of your ability to fix the amp, there's no harm in calling a professional.

